The CPU cooler is an essential component in all PCs, and you cannot make it up with the desired performance level until you get a powerful CPU cooler. Sometimes, the CPU cooler doesn’t perform optimally, and it causes issues while producing the required air pressure at the peak usage level.
Before anything happens out of the box, you need to counter this issue properly. How to remove CPU cooler accurately, I’ll share it all that enable you to examine it and clean it without making any mistakes. The dust, debris, or heat effects may turn your active CPU cooler into scrap.
The process has modified and simple steps to follow, such as turning off the PC, removal of the cooler cover, warming up the thermal paste, and you are ready to go for the main job. Removing the CPU cooler helps you deal with minor errors that may cause havoc if you do not curb them immediately.
Why is the CPU Cooler Removed for?
How to remove CPU cooler? It is the secondary question, the primary question, that I would like to let you know the reason for removal. When your CPU produces a lot of heat, and if the case is opened in a way that the dust can get in, your CPU cooling setup may not work optimally because of heating hazards and dusting issues.
So, to avoid such anomalies, you need to remove the CPU cooler first, and after analyzing it correctly, make it fit for the build and install it over again. It is how the life of the CPU cooler extends, and you get the best out of your PC with zero worries.
Related Article: How to fix CPU Overheating? 10 Cooling Solutions to Avoid Heat
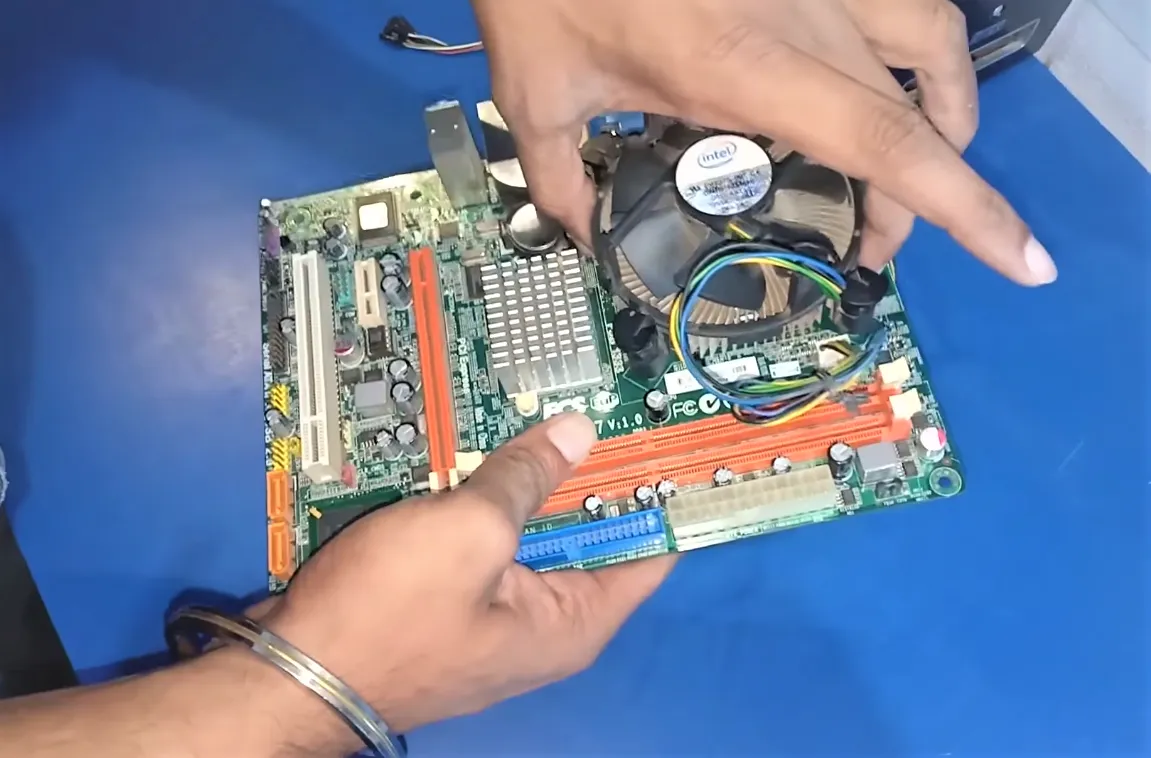
How to Remove CPU Cooler from Motherboard?
The process of removing the CPU is easy, and you do not need any pro expertise to do this job yourself—all you need to follow the manual or the information I am sharing below. I will also tell you how to remove CPU fans with the least labor. You are fortunate to reach this section to learn how to remove CPU cooler from motherboard by following the simple techniques below.
1) Turn Your PC Off
If you want your PC not to give you a shock, and you want the process to go smooth and flawless, you need to turn it off before you initiate the process. How to remove CPU cooler starts with turning off the PC and saving yourself from all the risks tangent with turning on the device. It keeps components safe and sound and avoids any potential threat.
2) Removal of CPU Cooler Cover
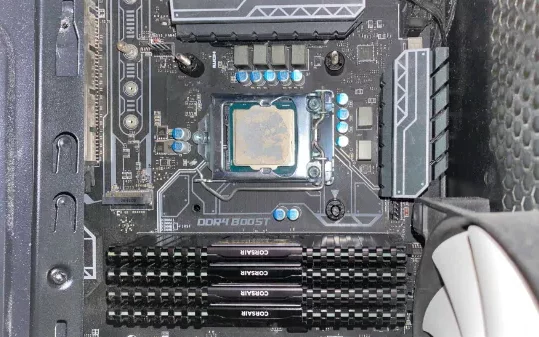
Not all, but most CPUs have a ventilation setup or duct on them. It is the phase that won’t allow you to remove the CPU cooler until you get it off. Please do not rush through the process and keep calm while removing it. It may cause you injury or may also cost you a whole unit. It would help if you pressed the clamps swiftly, and you are good to remove the CPU cooler cover.
3) Heating Thermal Paste
Thermal paste is a thing that helps your cooler. Connect with the CPU. Until you don’t get it in heated shape to disengage it properly, you will not be able to make it up with the process. It is a kind of welding that holds the CPU and cooler together, and you must eliminate it for a safe process. If you ignore it in any way, you will find the pins bent, and it is not something good for the PC.
4) Disconnection from the CPU
Multiple clips hold the CPU connected to the motherboard, and you won’t be able to get it off until and unless you take all these clips off. Pressing the clamps to help you disintegrate the unit instantly. And if you forget this step in a hurry or for any other reason, you will have to face the consequences. So, never play unsafe and keep the good things on board.
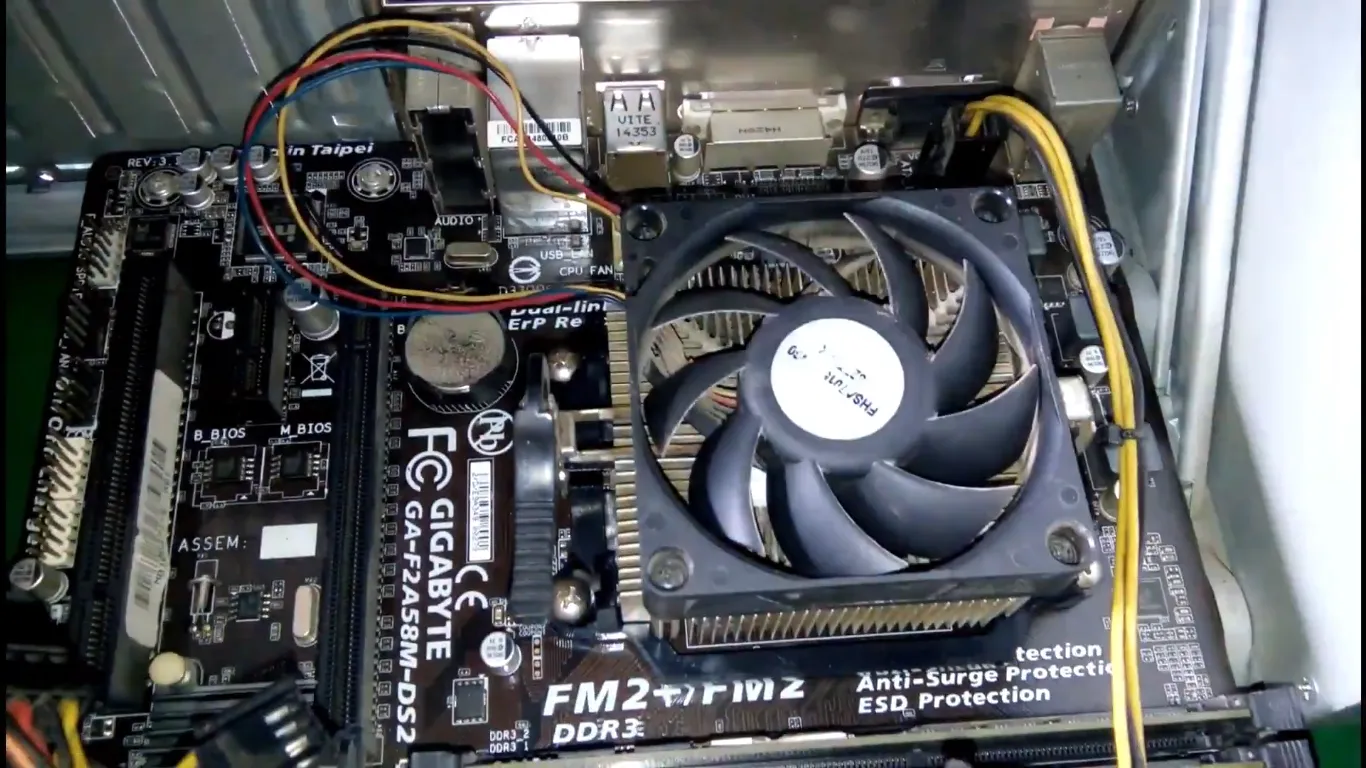
5) Disengagement of the Cooler
Before you pull the cooler out of your PC, you need to ensure that it has no connection with the motherboard. You need to locate the cable having three to four pins and get it off the motherboard. Be gentle while doing all this, and do not put brute force because it can destroy your cooler entirely or partially.
Moreover, pins require due care, and you should not pull pins through wires. So, it is how you can get the CPU cooler from the motherboard. If you miss any phases, you will not get the results you foresee.
How to Remove CPU Fan AMD?
Related Article: 8 Best Low Profile CPU Cooler for Overclocking
The process of removing CPU fan AMD has no distinction and almost follows the same steps. You must remove the retention clips for the motherboard socket and move the CPU clockwise a bit. Now, you will get the seal loosened, and you are good to pull the CPU out of the PC. It is how to remove CPU fan AMD super easily.
And if you wonder how to remove heat sink from CPU, the process starts with heating. You can use a dryer and put the air pressure on high. After doing so, you can easily remove the heat sink. Moreover, you can also learn about testing your PC with some of the most outstanding software today. If you are interested in learning, you can read about the best pc stress test software.
How to Remove CPU Cooler Backplate?
If I take a general perception, there is no need to remove a CPU cooler black plate anytime. It should always be there, and if you need to replace it, it is the only reason that compels you to remove it.
Moreover, if you know how to remove the cooler master CPU fan, you can easily make it up with the back plate’s removal process. It requires a simple tool to get it off, and if you do it with bare hands, you may have to face an injury. So, to avoid such incidents, you can only get the help of one or two tools.
Thermal paste is a substance that works as a connecting material between the cooler and CPU. If you keep it in cold form, you cannot get the CPU cooler out of the box. It requires heating up to some extent to melt the substance. Once it gets off the surface, you can easily remove the CPU cooler from the motherboard.
The screws are the components that ask for labor to remove them. You must have some screwdrivers of the highest quality, and by using them with power and twisting the screw anti-clockwise, you can easily remove them all. Screw shape and size may vary with the models, so be prepared with multiple screwdrivers.
To remove the CPU cooler brackets, you must put effort. It requires the highest quality tools and screwdrivers to loosen up the screws. You can get the CPU cooler off and put it on a straight table to remove the brackets. However, if you do not know how to take off CPU cooler, you can read the five points above.
I hope you are aware of how to remove CPU cooler now. Not in all cases, but in most, you can follow the five simple steps I explained above. In some rare cases, you might have to get help from some extra tools. Removing the CPU cooler allows you to examine the device and rectify anything that went wrong. It helps your cooler work optimally and deliver the best airflow to withstand the heating hazards produced by the CPU.
CONCLUSION


