One Airpod not charging is a common issue that most people face. It is an annoying matter that can create an issue with the user experience. Having trouble with only one Airpod charging can ruin the listening experience especially disturbing the gym and workout routine.
The problem is annoying as you cannot replace the non-working Airpods due to their high price tag. So, dealing with the problem seems more agitating. You can relate to the situation when you spent your saving on buying the Airpods and end up having the Airpods not holding charge on the next few days of buying.
Luckily, there are multiple solutions to try and sort this problem. It is easier to apply these solutions at home as nothing complex involves. We will get to the fix, but first, we will understand the charging mechanism and why Airpods not charging.
How Airpod Charges? Simple Method
Airpod charging depends on the case that comes with the purchase. It is responsible for the charging mechanism and holding the multiple charges to fill the juice while traveling. Once the battery gets fully charged, the Airpods can easily provide a listening time of about 5 hours and a talk time for the two hours on a single charge.
However, when you run out of the battery, charging the AirPods for 10-15 minutes can yield a listening time of three hours with an incredible talk time of one hour. There is great potential in the built-in battery of the AirPods as it provides a good and long-lasting shelf-life.
The charging in Airpods happens due to three key points. These contact points are following:
- Charging cable head that connects to the power source or an outlet.
- Another end of the USB cable (lightning connector) has a contact point with the case.
- Airpods connect inside the case for the charging.
If you observe no or slow charge, looking for the contact point is the first thing that comes to mind.
Reason for Your AirPods Not Charging?
It is always necessary to point out the root cause before heading towards the problem’s solution. If you observe that your right Airpod not charging or left airpod not charging, you need to understand the logic behind the issue before jumping to the solutions.
To get a brief background, let start with the variants of the Apple Airpods. There are two main variants of Airpods that come with the charging case. There is a substantial difference between the case as one case comes with wireless charging and the other lacks it.
It is common sense that your Airpods charge from these cases, so the first thing to look for when finding the problem is checking the charging case. The problem probably lies in the charging case and its contact points.
If you are unsure where to start, the next portion will enlighten you about the procedure and elaborate on what fixes you can do if one AirPod is not charging.
Related Article: 11 Fixing Methods | Why Do My AirPods Keep Disconnecting?
Why Is My Airpod Case Not Charging?
We have already mentioned that you should start looking for the issues in the charging case and contact points. Before questioning yourself, ” why won’t my AirPods charge” you need to look for the charging case and its functioning.
We have focused on the fixes that can let you charge your Airpod again and help you solve the problem without going to Apple customer care.
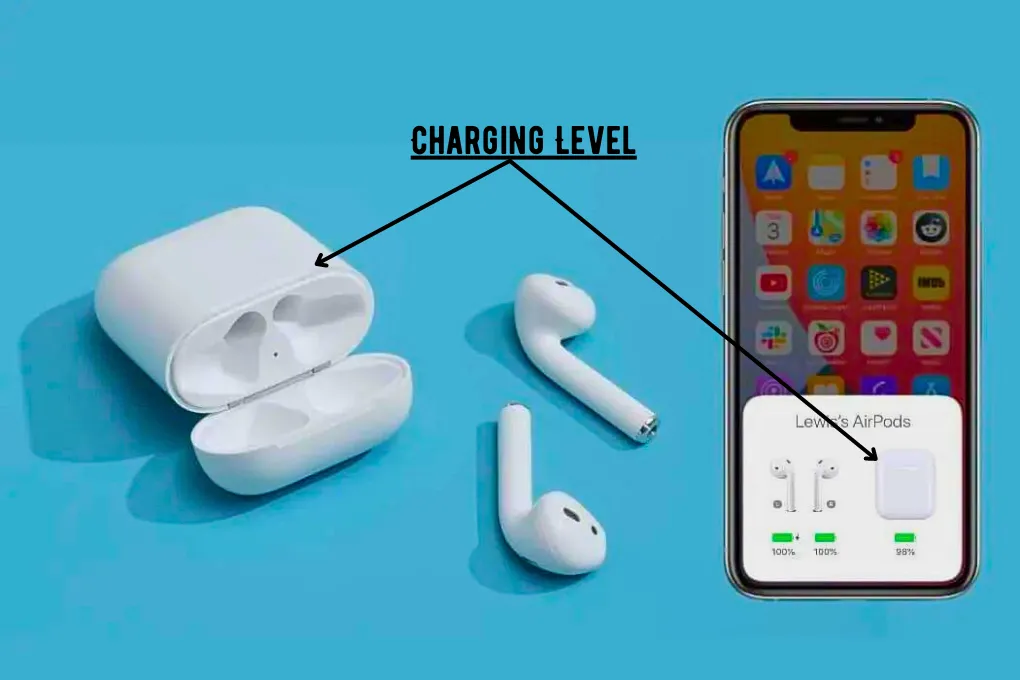
Checking the Battery Level of the Case
Sometimes, low battery levels of the charging case can result in one Airpod not charging in case. Check for the charging case battery level and ensure that the battery level is not less than 10%. Otherwise, it won’t charge the Airpods, and you can face the issue.
Commonly, people ignore the charging levels of the case that can cost them, especially when they don’t have to charge outlets during travel. It is a good practice to adequately charge the case before going out, as it can save you from any inconvenience caused by low battery levels.
The batteries in the Airpods are highly durable and premium quality Lithium-Ion Alcohol batteries. You don’t need to be concerned regarding overcharging on these batteries, as the charging case is smart enough to cut off the electrical flow once it reaches 100% charging level.
Related Article: How to Keep Airpods from Falling Out of Your Ear?
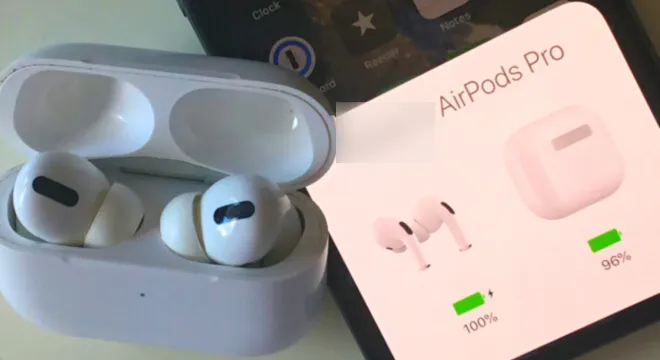
You can check the battery level by these easy steps:
- Put the AirPods inside the case and bring them near to the phone.
- Open the lid of the case and wait till the phone detects it.
- You can see the battery status on the screen and charge it if it shows a low percentage.
Alternatively, you can proceed to the next fix.
Use iPhone or iPad Charger
Apple recommends using the iPad or iPhone charger to charge the case of the Airpods. You can try using the charging and see if your Airpods restore the battery health or not.
If you don’t have an iPad or iPhone charger, you can borrow the charger from a friend and check if the charging cable or charger is the main issue or something else you need to verify.
Alternatively, connecting the charging case to the MacBook can also help you fix the issue. Connect the Airpod charging case to the MacBook and wait for the green status light to pop up.
You need to focus on connecting the contact point of the case and Airpods, as they can make a big difference. Close the lid properly as if there is a lack of adequate contact, the charging will not happen.
Reinsert the Airpods
You can face one Airpod not charging or connecting issue due to lack of contact of the Airpods with the charging port. It is not a big thing as most of us don’t care much when placing the Airpods inside the cover.
Reinserting the Airpods is the simplest thing that you can do to fix this issue. However, sometimes, if you use any accessories with the AirPods, they can block the contact point. So, ensure that you are not using any accessories that fit loose and get into the way of connecting the Airpods properly to the contact point.
You can prevent this issue by these easy steps:
- Remove Airpods from the case.
- Strip off any accessories that you are using on the Airpods.
- Now reinsert the Airpods into the case and watch if they started the charging or not.
Cleaning the Airpods and Case
Dirt is the primary agent that can block the Airpods charging contact points if you don’t clean them regularly. Dirt build-up can affect the charging as they can act as a medium to disrupt the proper charging. The dirt and grime affect the charging and muffle the audio by accumulating on the mesh screen.
It is best to clean the Airpods regularly, especially if they get exposed to the dirt more often. There is no specific routine for cleaning the Airpods. However, you can clean them as soon as you feel them started to get dirty.
If one Airpod not charging properly, you need to focus on cleaning the charging case and tail of the Airpod. Cleaning involves both external and internal cleaning, so don’t ignore one aspect.
External Cleaning
Take a cotton swab and 70% isopropyl alcohol. Dip the cotton into the liquid and rub it on the dirty areas of the charging case. You can use a clean toothpick or non-metal sharp object to clean the dirt from the case lines and corners. Once everything gets clean, use a tissue paper or paper towel to dry the case off.
Internal Cleaning
Most technicians suggest internal cleaning for people wondering, “why is my left airpod not charging.” Internal cleaning is similar to external cleaning, except for the more details involved in this method.
- Use a clean microfiber cloth or cotton swab and dip it into the 70% isopropyl alcohol to clean the charging case. Avoid any liquid entry into the charging port.
- Now take a dry cloth made of lint-free fabric and clean the tail of Airpods. You can use a toothpick to clean the debris or grime over the mesh. Using a soft-bristled toothbrush is also a viable solution.
- You can use the periodontal brush to clean the contact points on the charging case. If you don’t have this brush, you can use regular straw cleaner.
- Once you are done cleaning, ensure that you charge the Airpods for 10-15 minutes. Check if your one Airpod not charging issue got resolved or not. For most cases, the issue gets resolved after properly cleaning the internal and external contact points.
Update Your AirPods Firmware
It is not usual that you see this method as a suggestion for one Airpod not charging or one Airpod not charging correctly. You require this solution if it’s been a while since you have connected the Airpods to the Apple devices.
Airpods firmware updates most of the time automatically if you regularly connect them with your iPad or iPhone. However, after months of connectivity, there are chances that you have missed some important updates.
For the update, you need to follow these steps:
- Put the Airpods into the case and connect the case to the power source for charging.
- Move the case near to iPad or iPhone and let them pair.
- Turn on the Internet connection on your device and prefer Wi-Fi as it will take some data to update the firmware.
- Depending on your internet speed, wait for 10-15 minutes. The updates will automatically install on your Airpods.
- After updating, check if you can use the Airpod and if they started the charging or not. If it does not work, try resetting them by following the next solution.
Reset the Airpods
When one Airpod not charging sometimes and you have tried everything to deal with the problem, the last solution is to reset the Airpods. There is always a possibility that your software or firmware is why the one Airpod not charging.
In this case, resetting the Airpods can help your device function properly and go back to the factory settings.
Here are the exact steps required for resetting the Airpods:
- Insert the Airpods inside the case and bring them close to your iPad or iPhone.
- Once connected, go to the setting and tap the “I” button.
- Now click on the “Forgot this device.”
- Hold the pair button on the Airpods and wait for the status light to change its color to amber. It indicates the reset status.
Now again, pair the Airpod by placing them into the case and bringing them close to the device. Hopefully, they will start working now and charge without any issue.
Troubleshoot: Unable to Reset AirPods
When one Airpod Pro not charging, resetting is the last resort. However, when resetting the Airpods, a common issue for the users is getting stuck with the reset. It happens because the users do not properly initiate the resetting.
The proper way to reset Airpods is by holding the setup button behind the case and pressing it until the light flashes white. It will turn into amber and then again start to flash white repeatedly.
For some reason, few users won’t see an amber light when they initiate the reset procedure by holding the back button on the case. It continuously shows a white color flash no matter what you try, making the reset impossible.
- The ultimate solution to reset the Airpods in this situation is by taking these steps:
- Go to the iPhone settings and reset the “Network Settings.” You can do it by going Settings/General/Reset/Reset Network Settings.
- It will reset the network settings. After that, disconnect the Airpods by going into the Bluetooth Settings and choosing to forget.
- Now you can try resetting the Airpods and check if one Airpod not charging issue got resolved or not.
When to Contact Third-Party Services?
The DIY methods given above are handy for most cases. However, they may be an issue of one Airpod not charging or one Airpod not charging as fast, which requires an examination from the expert.
When everything else fails, the best measure you can take is visiting the nearest Apple Store and giving them a chance to cure your issue. They likely have an expert that can look into your issue and resolve it or advise you what the best solution is.
Most of the time, they offer two solutions, replace or repair. It is unlikely that you can go for the repair option when a repair option is waiting for you. After all, it is your investment from hard-earned money, and you don’t want to miss a chance for a free replacement.
Here is what you can do if you experience a similar situation:
- Getting a two-year warranty for your Airpods comes in handy in this situation. You can opt for AppleCare+ Warranty for an additional $29 when purchasing them. It helps you to claim the free replacement if any issue related to the battery happens.
- If you have a Subpar Aripod unit, you will likely get it replaced as it cannot last 5 hours of listening time.
- If you don’t have both above solutions, you can get the “Battery Service.” However, it will cost you $49 to replace your charging case or one Airpods.
If you face any issue with the Airpod charging, it is possibly the dirt or grime at the contact points that interfere with the normal contact. To solve the issue, you can try removing any dirt and carefully placing the Airpod into the case on the contact points. For a comprehensive solution, see our guide.
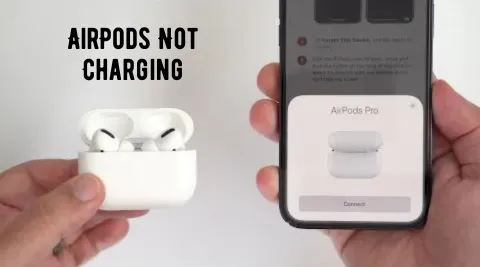
Sometimes one Airpod not charging correctly issue can cause your problem. To solve the issue, take the iPhone near the opened case and check the battery level of the Airpods. If you don’t see the lighting bolt symbol near the battery icon, the Airpod is not charging. If you see the option, it is charging correctly.
We hope that you can resolve one Airpod not charging issue after this read. The methods given here are simple and do not require any complicated procedures. Most people do the trick, and sometimes a little cleaning and inspection are required to charge the Airpods properly.
If you happen to try all the methods and are still unable to charge the Airpods, claiming the warranty or going to a replacement sounds like a much better resort. We hope that these tips have helped you in solving the issue. For feedback and more questions, you can contact us in the comment section.
FINAL CONCLUSION


