Your operating system employs CPU parking to turn off idling processor cores to conserve energy. Therefore, a core would not use any power while there is no load on it. It is comparable to parking your automobile, which doesn’t use any fuel when it is in the garage.
Alternatively, you must unpark your CPU to restart the idle core. Therefore, CPU unparking restores a CPU core to full operation. As a result, your operating system will assign some unique power management variables to your CPU when you unpark it. You’re in the right place if you’re seeking how to unpark CPU cores.
Why Are My CPU Cores Parked?
Some of your CPU cores enter sleep mode when you use the CPU Core Parking tool. Therefore, a parked CPU simply denotes that some CPU cores turn off when maximum computing capability isn’t needed. Some idle CPU cores on your device will automatically wake up when it has a lot of work to process.
Can You Disable Cores On CPU?
As a result, there will be no adverse effects on your CPU, and it is perfectly safe. CPUs build to run all their cores simultaneously.
It is evident that turning off cores reduces CPU performance, and it is uncommon to wish to disable all but two Performance-cores. In some circumstances, though, performance can enhance by turning down some cores.
But is it safe to Unpark a CPU? The trade-off of removing parking is present. Once you turn off core parking on your CPUs, you can notice a little change in battery life if you use a laptop or tablet. If you turn off core parking on your CPUs, your computer may perform better on benchmark tests.
Related Article: How To See CPU Usage On Mac? 5 Easy Methods
What Does Unpark CPU Windows 10 Do?
By altering the power management settings, unparking keeps all cores and threads active. The operating system keeps the cores active and prevents them from falling asleep. If core unparking will improve CPU responsiveness and daily gaming performance makes sense. It significantly decreases the latency while significantly boosting the FPS.
The performance improvement, however, varies depending on your operating system, CPU generation, number of cores, and the applications and games you are using.
Some users claim to have seen performance increases of over 20%, while others report no discernible improvement. Windows 7 and earlier users benefit the most and see a significant increase in performance.
Windows 10 is a sophisticated and intelligent operating system that can decide when to park and unpark cpu cores Windows 11. To satisfy the needs, it might alter the power plan.
3 Ways to Unpark the CPU Cores
Now, if you want to unpark your cores, you may accomplish it with Windows or using tools from a third party. Here are the different methods:
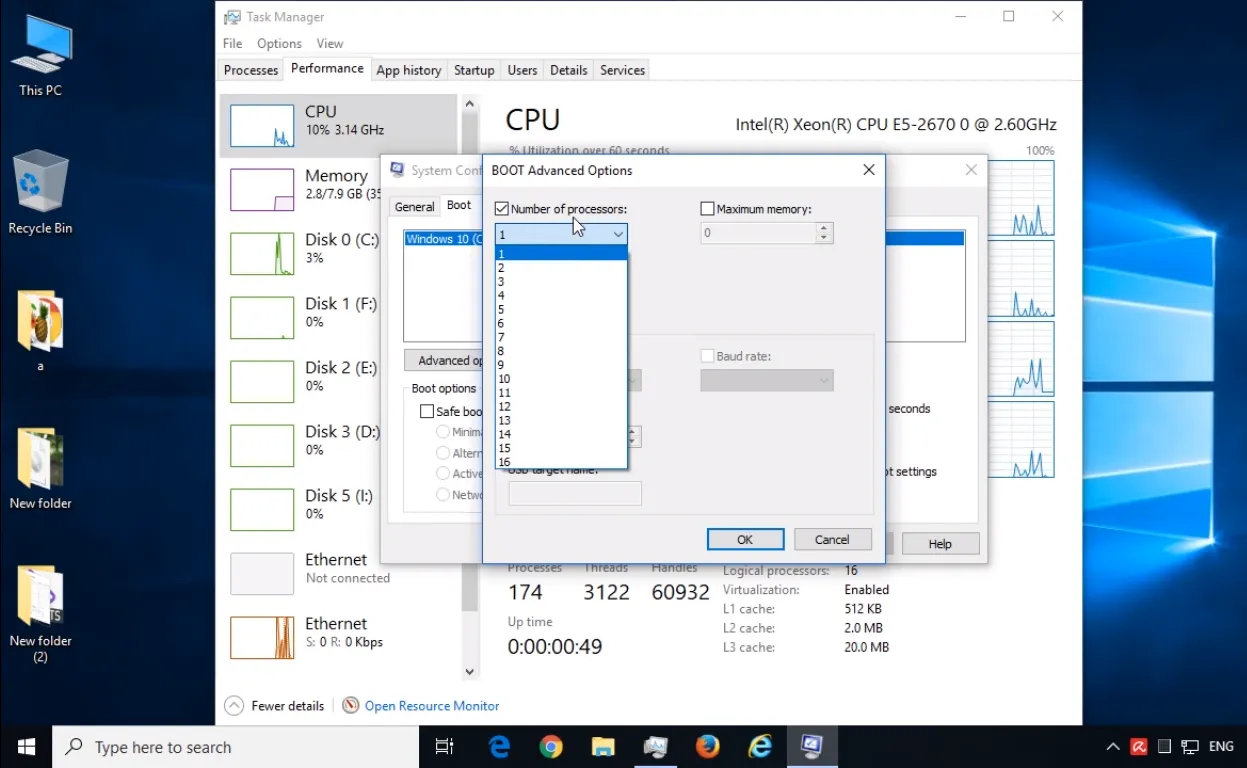
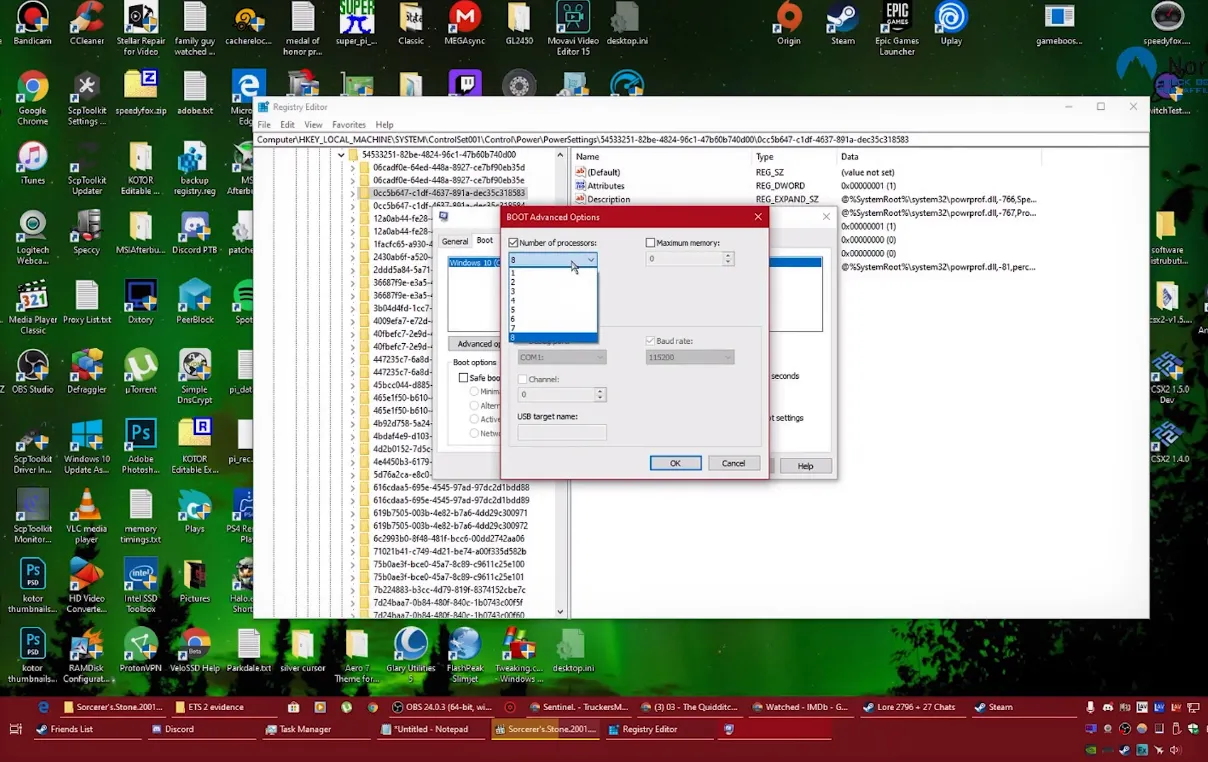
Method#1: How Do I Unpark CPU Cores in Registry?
- Open the Run box by pressing the Windows+R keyboard shortcut.
- Enter Regedit into the text field.
- Open the Windows Registry Editor, click the Edit tab, followed by Find.
- 0cc5b647-c1df-4637-891a-dec35c318583 should copy and paste into the search field.
- Select Find Next after selecting the box next to the Match Complete string alone.
- The Value Max and Value Min settings are the only ones you must change once you reach a new page.
- You can set the Value data box’s value to 0 by clicking twice on Value Max.
- Value Min should be treated similarly, with its value changed to 0.
- Restart your computer.
Method #2: Using CPU Unparking Tool
One of the apps designed to unlock your CPU cores by automatically editing the registry is called Unpark CPU. Here are the steps:
- Install the UnparkCPU.exe file after extracting the CPU Unparking Tool application from your download.
- Click the Check Status button when the app has opened.
- Once you have seen every CPU core that parks, click the Unpark All button to finish.
- Check if all the CPU cores are unparked by rebooting your computer and launching the app again.
Method #3: Modifying Power Management Settings
The last technique is the simplest but less successful than the others. I only change to a high-performance power plan.
Power Options can find by opening the Control Panel. Select High Performance in this window. Click the arrow next to Show additional plans to reveal this option if you don’t see it. Doing this can enhance your computer’s efficiency and frequently lessen game latency and stutter. You can safely utilize this Windows function even if your laptop or computer lacks the best thermals. As with the other approaches, you are not manually forcing the system, which is the best.
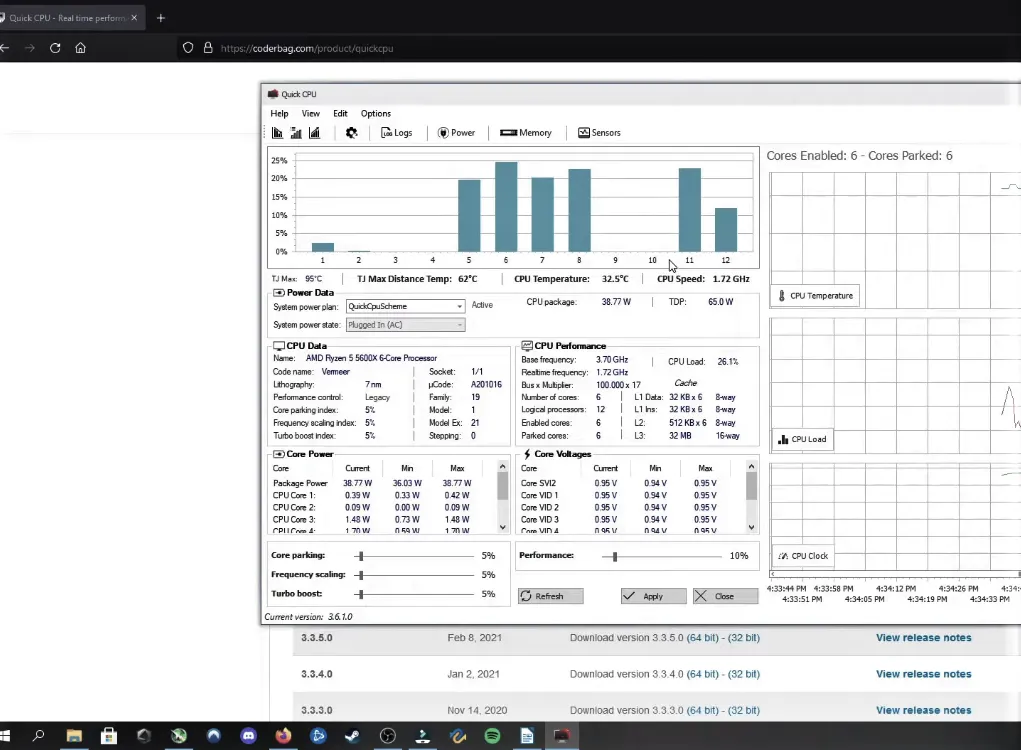
It manages the number of CPU cores that must turn on or off. It has the feature of a performance graph for each core that indicates whether it is in use or idle. It is a real-time counter that contrasts the number of active and idle cores. And it shows additional data in the CPU data section.
A higher processing rate achieves when numerous cores are active at once. High-performance computing builds upon this. When dealing with numerous jobs and intensive workloads, processors with multiple cores also improve performance.


