If you are not an Apple user, you might have no interest in this article. On the other hand, Apple users will get something exciting with an authentic and impartial approach. You can access any service easily by linking your ID. However, iMessage allows Mac users to send or receive messages to any Apple device. And if you don’t want this service to spoil your Mac screen, here is how to sign out of iMessage on Mac.
Apple has offered so many services to its customers, such as Cloud Photos, iMessage, FaceTime, etc. Sometimes users do not want to use a service anymore, but they need to know the way out. If it is iMessage, you will surely get some awesome hacks to sign out of iMessage. You can either deactivate the account or can sign out quickly. A constant message on the screen distracts the users while doing any work, and so does the iMessage. Let’s find ways to sign out of it.
What Does iMessage Means?
Everyone knows the name of the Apple company, and over time it has offered so many to its customers. One of the services is iMessage. It is an account through which you can communicate with any Apple device and send and receive messages. It provides excellent fast service, and you get a popping notification on the screen every time you receive a message, or any development happens. It is an iMessage service by an Apple giant.
Why Sign Out of iMessage?
The question is, why sign out of iMessage if it connects? The reasons may vary, but if I share my experience of why I did so, it was so smooth. I don’t want anything to pull my nerves anytime. It isn’t delightful to get popping messages during FaceTime, gaming, or doing something important. It is a fair enough reason for most users to get rid of the iMessage service.
Whenever you receive a message or the company wants to convey about any development, whether it is on the ground or on the way yet, you will undoubtedly receive the notification. So, to avoid such a frustrating iMessage facility, this article will tell you the step-by-step process of signing out. Moreover, you will find practical ways to get rid of this mess. Let’s find out what the roadmap is.
How to Sign Out of iMessage on Mac Step by Step?
There is no complicated procedure, but you need to follow only five simple steps, and you will get to know the nitty-gritty of the topic. How can I sign out of iMessage on Mac? Let’s find out the details below.
- First, you need to open the cooperating system Message application on your Mac. Here you need to press space with Command
- You need to focus on the top menu, find messages, and click. Now, choose the Preferences
- You will find various options, select the iMessage
- If you want to get rid of temporary, you can uncheck the box
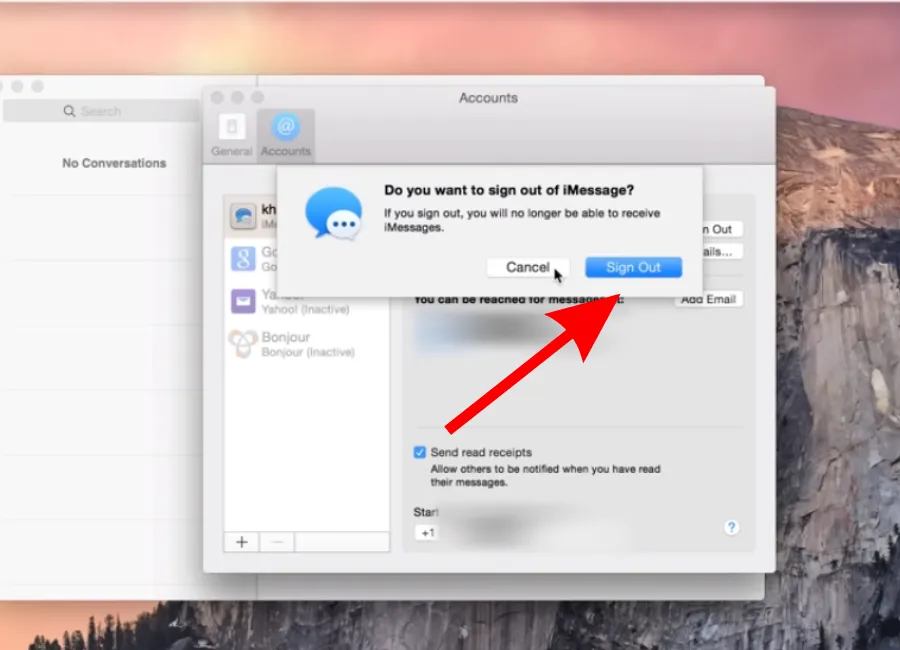
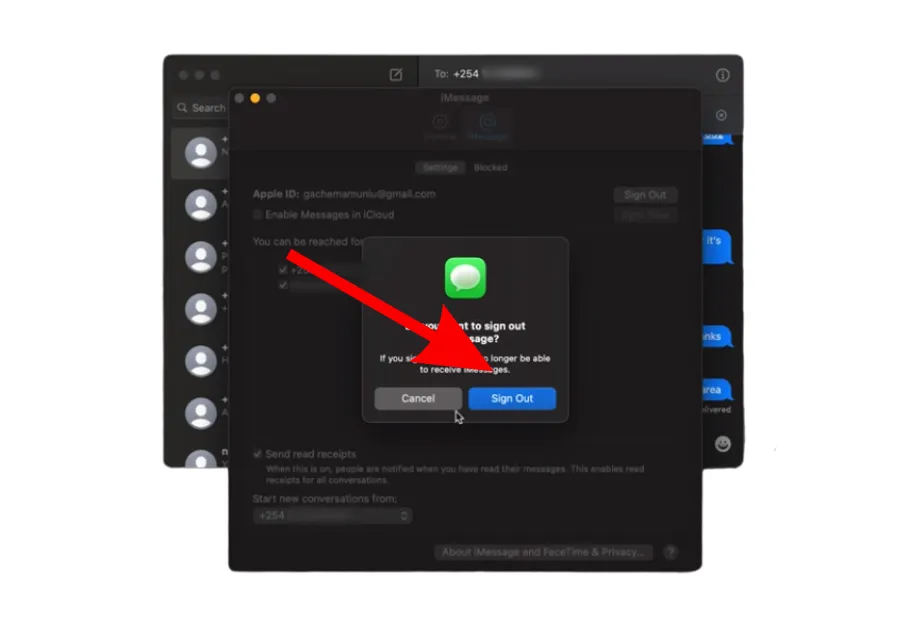
- On the other hand, if you need to stop it fully, you need to click on sign out and confirm it right away
It is how you can quickly sign out of iMessage on Mac. Now I’ll tell you some bonus tips to avoid iMessage popping notifications. If you want how to sign out of iMessage on Mac 2023, follow the steps above, and the other solutions are given below.
3 Easy Ways to Get Rid of iMessage on Mac
If you are looking for a safe mode to sign out of iMessage, don’t worry, I got you a bunch of three. Moreover, how do you Permanently Sign out from iMessage on a Mac? Here is how to do so.
1) Turn Off iMessage Notifications
The annoying problem that I faced myself was the constant popping of notifications. If you are having the same, you can turn off the iMessage notifications by following the steps below.
- In the top menu, click on the Apple logo
- Now choose the System Preferences
- Go to Notification Tab and select messages
- Now turn the notifications toggle off
By going through the steps, you can easily avoid getting notifications. You can easily send or recover messages, but no notification will come your way to bother you and your screen. Being a professional or an enthusiast, it is so irritating when an unnecessary notification grabs all your attention
2) Deactivate iMessage on Mac
If you want to avoid signing out permanently, you can go for deactivation of the iMessage account by disabling it. It is a simple process consisting of a few easy steps, and let’s follow the words down.
- You need to open the iMessage application
- In the top menu, find Messages stab and choose Preferences
- Now you need to switch to the Account tab
- Now uncheck the option Enable this Account
It is now you can stop getting iMessage notifications. However, if you need to reopen them again, you can check the option, Enable this account again.
3) Remove the Device from Apple ID
Another important way to stop getting modifications for the iMessage application is to remove the device from the Apple ID page. It takes no time but a few seconds, but keep in mind you should go for removal if you do not get help from the solutions above. Here is how you can do this so conveniently.
- You need to get Safari browser on board, open it on the Mac
- Now get access to the Apple ID Page
- Log in to your Apple ID
- Scroll down to the Devices section
- And choose the Mac and click on Remove from Account
Once the process is complete, you won’t receive any notification from your account, and it is how you can find a way to avoid annoying notifications. Before I wrap up the article, you can read about the best Logitech gaming mouse if you are a gamer.
By turning off your iMessage accounts, you won’t be able to send or receive messages from any Apple device such as Mac, Tablet, iPhone, etc. So, if you intend to do so, keep in mind the outcomes and then go for the shot.
Signing out in safe mode is the way. If you cannot sign out of iMessage, you can reboot the Mac in safe mode. The grey option will turn into un-grey by reporting in safe mode, and you can sign out quickly. However, before signing out, you need to turn your Mac off again and turn it on.
I will provide you with all possible solutions for how to sign out of iMessage on Mac. You can either sign out or deactivate the account as you feel comfortable doing that. However, to avoid annoying popping notifications on the screen, you can go through the five-step process I explained above. Moreover, you can also sign out or remove your account from the Apple ID page. Find the detailed information above.
Wrap Up:


